Friday, March 20, 2020

Docker

What is Docker?
Image result for docker
Docker is a tool that allows developers, sys-admins etc. to easily deploy their applications in a sandbox (called containers) to run on the host operating system i.e. Linux. Docker is a containerization platform that packages your application and all its dependencies together in the form of a docker container to ensure that your application works seamlessly in any environment.


Docker is a set of platform as a service products that uses OS-level virtualization to deliver software in packages called containers. Containers are isolated from one another and bundle their own software, libraries and configuration files; they can communicate with each other through well-defined channels.

Screenshot of how Docker looks like when it is getting installed properly.


Tuesday, March 17, 2020

Apache JMeter

What is JMeter?

Apache Jmeter is a popular open source performance testing tool. You can use JMeter to analyze and measure the performance of web application or a variety of services. Performance Testing means testing a web application against heavy load, multiple and concurrent user traffic. JMeter originally is used for testing Web Application or FTP application. Nowadays, it is used for a functional test, database server test etc.

Why JMeter?

Have you ever tested a web server to know how efficiently it works? How many concurrent users can a web server handle?

Let say that one day, your boss asks you to do performance testing of www.google.com for 100 users. What would you do?

It's not feasible to arrange 100 people with PC and internet access simultaneously accessing google.com Think of the infrastructure requirement when you test for 10000 users (a small number for a site like google). Hence you need a software tool like JMeter that will simulate real-user behaviors and performance/load test your site.

How does JMeter work?
The basic workflow of JMeter as shown in the figures below:

JMeter simulates a group of users sending requests to a target server, and return statistics information of target server through graphical diagrams.
Introduction to JMeter

The completed workflow of JMeter as shown in the figure below
What is Element in JMeter?
The different components of JMeter are called Elements. Each Element is designed for a specific purpose.
The figure below gives some common elements in JMeter.

Thread Group:

Thread Groups is a collection of Threads. Each thread represents one user using the application under test. Basically, each Thread simulates one real user request to the server.

The controls for a thread group allow you to Set the number of threads for each group.

For example, if you set the number of threads as 100; JMeter will create and simulate 100 user requests to the server under test.
Complete Element reference for Jmeter
Samplers:
As we know already that JMeter supports testing HTTP, FTP, JDBC and many other protocols. We already know that Thread Groups simulate user request to the server.

But how does a Thread Group know which type of requests (HTTP, FTP etc.) it needs to make?
The answer is Samplers.The user request could be FTP Request, HTTP Request, JDBC Request...Etc.
Complete Element reference for Jmeter
Listeners
Listeners: shows the results of the test execution. They can show results in a different format such as a tree, table, graph or log file.
Complete Element reference for Jmeter
Configuration Elements:
set up defaults and variables for later use by samplers.

The figure below shows some commonly used configuration elements in JMeter.
Complete Element reference for Jmeter
CSV Data Set Config:

Suppose you want to test a website for 100 users signing-in with different credentials. You do not need to record the script 100 times! You can parameterization the script to enter different login credentials. This login information (e.g. Username, password) could be stored in a text file. JMeter has an element that allows you to read different parameters from that text file. It is "CSV Data Set Config", which is used to read lines from a file, and split them into variables.
Complete Element reference for Jmeter

This is an example of CSV Data. It's a text file which contains user and password to login your target website.

If you want know more about Jmeter click on the below link..


Performance Testing

What is Performance Testing?

Performance Testing checks the speed, response time, reliability, resource usage, scalability of a software program under their expected workload. The purpose of Performance Testing is not to find functional defects but to eliminate performance bottlenecks in the software or device.

The focus of Performance Testing is checking a software program's
  • Speed - Determines whether the application responds quickly
  • Scalability - Determines maximum user load the software application can handle.
  • Stability - Determines if the application is stable under varying loads
Performance Testing is popularly called “Perf Testing” and is a subset of performance engineering.
Image result for what is performance testing

Why do Performance Testing?
Features and Functionality supported by a software system is not the only concern. A software application's performance like its response time, reliability, resource usage and scalability do matter. The goal of Performance Testing is not to find bugs but to eliminate performance bottlenecks.

Performance Testing is done to provide stakeholders with information about their application regarding speed, stability, and scalability. More importantly, Performance Testing uncovers what needs to be improved before the product goes to market. Without Performance Testing, software is likely to suffer from issues such as: running slow while several users use it simultaneously, inconsistencies across different operating systems and poor usability.


Performance testing will determine whether their software meets speed, scalability and stability requirements under expected workloads. Applications sent to market with poor performance metrics due to nonexistent or poor performance testing are likely to gain a bad reputation and fail to meet expected sales goals. 
Also, mission-critical applications like space launch programs or life-saving medical equipment should be performance tested to ensure that they run for a long period without deviations.
Only for a 5-minute downtime of Google.com (19-Aug-13) is estimated to cost the search giant as much as $545,000.
It's estimated that companies lost sales worth $1100 per second due to a recent Amazon Web Service Outage.
Hence, performance testing is important.

Types of Performance Testing
Image result for what is performance testing
Load testing: checks the application's ability to perform under anticipated user loads. The objective is to identify performance bottlenecks before the software application goes live.
Stress testing: involves testing an application under extreme workloads to see how it handles high traffic or data processing. The objective is to identify the breaking point of an application.
Endurance testing: is done to make sure the software can handle the expected load over a long period of time.
Spike testing: tests the software's reaction to sudden large spikes in the load generated by users.
Volume testing: Under Volume Testing large no. of. Data is populated in a database and the overall software system's behavior is monitored. The objective is to check software application's performance under varying database volumes.
Scalability testing: The objective of scalability testing is to determine the software application's effectiveness in "scaling up" to support an increase in user load. It helps plan capacity addition to your software system.

Performance testing metrics:
A number of performance metrics, also known as key performance indicators (KPIs), can help an organization evaluate current performance compared to baselines.

Performance metrics commonly include:
Throughput: how many units of information a system processes over a specified time;
Memory: the working storage space available to a processor or workload;
Response time, or latency: the amount of time that elapses between a user-entered request and the start of a system's response to that request;
Bandwidth: the volume of data per second that can move between workloads, usually across a network;
CPU interrupts per second: the number of hardware interrupts a process receives per second.

These metrics and others help an organization perform multiple types of performance tests.

Performance Testing Process:
The methodology adopted for performance testing can vary widely but the objective for performance tests remain the same. It can help demonstrate that your software system meets certain pre-defined performance criteria. Or it can help compare the performance of two software systems. It can also help identify parts of your software system which degrade its performance.

Below is a generic process on how to perform performance testing
Image result for Process of performance testing

Identify your testing environment: Know your physical test environment, production environment and what testing tools are available. Understand details of the hardware, software and network configurations used during testing before you begin the testing process. It will help testers create more efficient tests.  It will also help identify possible challenges that testers may encounter during the performance testing procedures.
Identify the performance acceptance criteria: This includes goals and constraints for throughput, response times and resource allocation.  It is also necessary to identify project success criteria outside of these goals and constraints. Testers should be empowered to set performance criteria and goals because often the project specifications will not include a wide enough variety of performance benchmarks. Sometimes there may be none at all. When possible finding a similar application to compare to is a good way to set performance goals.
Plan & design performance tests: Determine how usage is likely to vary among-st end users and identify key scenarios to test for all possible use cases. It is necessary to simulate a variety of end users, plan performance test data and outline what metrics will be gathered.
Configuring the test environment - Prepare the testing environment before execution. Also, arrange tools and other resources.
Implement test design: Create the performance tests according to your test design.
Run the tests - Execute and monitor the tests.
Analyze, tune and retest: Consolidate, analyze and share test results. Then fine tune and test again to see if there is an improvement or decrease in performance. Since improvements generally grow smaller with each retest, stop when bottle-necking is caused by the CPU. Then you may have the consider option of increasing CPU power.

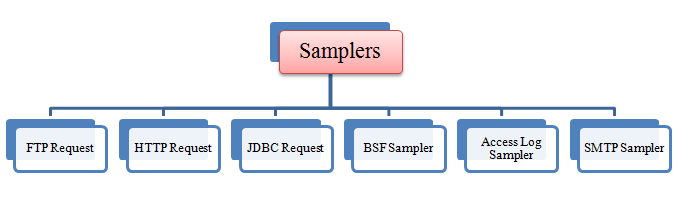
Many tools are available in market for Performance Testing:
Apache JMeter
WebLOAD
LoadUI Pro
LoadView
NeoLoad
LoadRunner
Silk Performer

Swagger

Swagger:

Swagger is a powerful yet easy-to-use suite of API developer tools for teams and individuals, enabling development across the entire API life-cycle, from design and documentation, to test and deployment. Swagger is a specification for documenting REST API. It specifies the format (URL, method, and representation) to describe REST web services. Swagger is meant to enable the service producer to update the service documentation in real time so that client and documentation systems are moving at the same pace as the server. The methods, parameters, and models description are tightly integrated into the server code, thereby maintaining the synchronization in APIs and its documentation. 
Image result for what is swagger
Swagger is a set of open-source tools built around the OpenAPI Specification that can help you design, build, document and consume REST APIs. The major Swagger tools include:

  1. Swagger Editor: browser-based editor where you can write OpenAPI specs.
  2. Swagger UI: renders OpenAPI specs as interactive API documentation.
  3. Swagger Codegen: generates server stubs and client libraries from an OpenAPI spec.

Advantages:
  • With the Swagger framework, the server, client and documentation team can be in synchronization simultaneously.
  • As Swagger is a language-agnostic specification, with its declarative resource specification, clients can easily understand and consume services without any prior knowledge of server implementation or access to the server code.
  • The Swagger UI framework allows both implementers and users to interact with the API. It gives clear insight into how the API responds to parameters and options.
  • Swagger responses are in JSON and XML, with additional formats in progress.
  • Swagger implementations are available for various technologies like Scala, Java, and HTML5.
  • Client generators are currently available for Scala, Java, JavaScript, Ruby, PHP, and Action script 3, with more client support underway.
Why have we chosen Swagger ?
  • It is simple to use, to design and model APIs according to specification-based standards (OpenAPI specification).
  • It has a good interface and helps improving developer experience with interactive API documentation.
  • Performs simple functional tests.
  • It is stable, it’s possible to reuse code.
  • It has good integration plugins with Code Editors.
  • It has pro and open source tools.

POSTMAN

What is Postman?
Postman is currently one of the most popular tools used in API testing. It started in 2012 as a side project by Abhinav Asthana to simplify API workflow in testing and development. API stands for Application Programming Interface which allows software applications to communicate with each other via API calls.

Why Use Postman?
Here are some reasons we should use Postman and Newman for API testing.

1. Easily create test suites
Postman allows you create collections of integration tests to ensure your API is working as expected. Tests are run in a specific order with each test being executed after the last is finished. For each test, an HTTP request is made and assertions written in javascript are then used to verify the integrity of your code. Since the tests and test assertions are written in JavaScript, we have freedom to manipulate the received data in different ways, such as creating local variables or even creating loops to repeatably run a test.
2. Store information for running tests in different environments
You wrote your test collection and it all works perfectly. You can run it again and again against your local environment and every test passes every time. But your local environment is usually configured a little differently than a test server. Luckily, Postman allows you to store specific information about different environments and automatically insert the correct environment configuration into your test. This could be a base URL, query parameters, request headers, and even body data for an HTTP post.
blog_pic_2.png
3. Store data for use in other tests
Postman also allows you to store data from previous tests into global variables. These variables can be used exactly like environment variables. For example, you may have an API that requires data received from another API. You can store the response (or part of the response, since it is JavaScript) and use that as part of a request header, post body, or URL for the subsequent API calls.
4. Automation Testing: Through the use of the Collection Runner or Newman, tests can be run in multiple iterations saving time for repetitive tests.
5. Debugging: Postman console helps to check what data has been retrieved making it easy to debug tests.
6. Continuous Integration: With its ability to support continuous integration, development practices are maintained.
7. Integrates with build systems, such as Jenkins using the Newman command line tool
Postman has a command line interface called Newman. Newman makes it easy to run a collection of tests right from the command line. This easily enables running Postman tests on systems that don’t have a GUI, but it also gives us the ability to run a collection of tests written in Postman right from within most build tools. Jenkins, for example, allows you to execute commands within the build job itself, with the job either passing or failing depending on the test results.
blog_pic_5.png
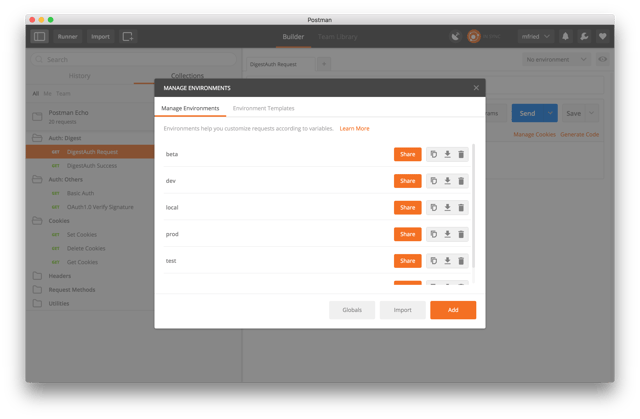
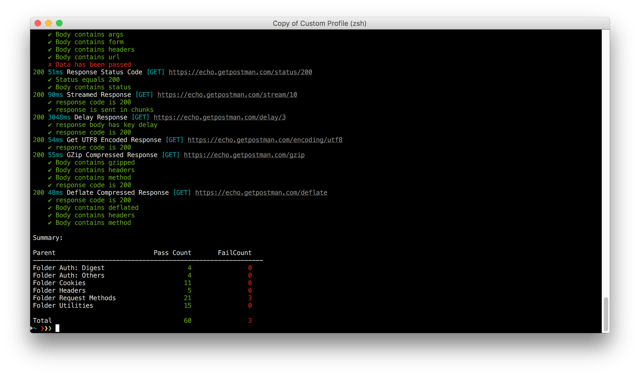
More Details about POSTMAN use this link https://www.guru99.com/postman-tutorial.html

  1. What is Postman?
  2. Why Use Postman?
  3. How to use Postman
  4. Working with GET Requests
  5. Working with POST Requests
  6. How to Parameterize Requests
  7. How to Create Postman Tests
  8. How to Create Collections
  9. How to Run Collections using Collection Runner
  10. How to Run Collections using Newman

Monday, March 16, 2020

API Documentation

API Documentation:

API documentation is a technical content deliverable, containing instructions about how to effectively use and integrate with an API. It’s a concise reference manual containing all the information required to work with the API, with details about the functions, classes, return types, arguments. API Documentation has traditionally been done using regular content creation and maintenance tools and text editors.
API description formats like the OpenAPI/Swagger Specification have automated the documentation process, making it easier for teams to generate and maintain them. Example of API Documentation.

Image result for why api documentation

Why Document APIs?
We are in the multi-platform economy era and APIs are the glue of the digital landscape. If you want your API to be used by developers, be sure to provide them with the proper documentation to understand it. Developers are very demanding people, they want to immediately understand how to use your API, they don’t want to waste time. Have a look to the following points:
  • Improves the experience for developers using our API.
  • Decreases the amount of time spent on-boarding new users (internal developers or external partners). New users will start being productive earlier and will not depend on a person (already with the knowledge) who would need to spend slots of their time to explain how the API is design and how it works.
  • Leads to good product maintenance and quicker updates. It helps your internal teams know the details of your resources, methods, and their associated requests and responses, making maintenance and updates quicker.
  • Agreement on API specs for the endpoints, data, types, attributes and more. And this helps internal and external users to understand the API and know what it can do.
  • The API contract can act as the central reference that keeps all the team members aligned on what your API’s objectives are, and how the API’s resources are exposed.
  • Unblocks development on different sides (front-end / back-end / mobile development) due to dependencies on specification.
  • Allows identifying bugs and issues in the API’s architecture when defining it with the team.
  • Decreases the amount of time (and headaches) spent on understanding how the API works and deciphering unexpected errors when using it.
Write a good Documentation:
Your documentation must be understood even by people who are new in the API Industry.
  • Authentication: be sure to document this section in detail. Describes how to use authentication schemes to consume your API.
  • Terms of use: the legal agreement between the producer and the consumer. Clearly specify the constraints and help consumers to understand what are the permitted uses of your API.
  • Change-log: update the versions of your API, making it stable for your consumers.
  • Error messages: Error messages are also critical because they tell your consumers when they are using your API incorrectly. Provide also the solutions to overcome them. Write down all the possible error codes.

Saturday, March 14, 2020

API Testing

What is API?
An Application Programming Interface (API) acts as a conduit for communication and the exchange of data among different software systems. Systems equipped with APIs contain functions and sub-routines accessible for execution by other software systems.
https://lh6.googleusercontent.com/_nYCLkTG8PO_Wx5-jkdIq3Wyo1PBGrh4wiincNkb5cnZijpxfzCclyxMJbNwYItS8T3Iao-Cqm5WphPy4d4Mlihszki6MBiqZA7NBwTnuFxU49ppZEZyv8v0QEEVAA9Ai3buwhG7


What is API Testing?
API testing involves evaluating the robustness of Application Programming Interfaces (APIs) through various tests. Its main objective is to ensure the functionality, dependability, efficiency, and security of these interfaces. Unlike traditional testing methods involving user inputs via keyboards and graphical user interfaces (GUIs), API testing relies on software to interact with the API, gather responses, and monitor system actions. API tests differ from GUI tests in that they prioritize examining the business logic layer of the software architecture rather than its visual elements.

Image result for What is API Testing?
For API testing, you require an application accessible via an API. When conducting API testing, you can choose between two approaches:

Use a testing tool to interface with the API.
Develop your own code to execute API testing.


Test Cases for API Testing:
API testing test cases are grouped according to specific criteria:

  1. Return value based on input conditions: This involves verifying the outcome when input is provided, allowing for relatively straightforward result validation.
  2. No return value: In scenarios where an API does not yield a return value, it's essential to examine its behavior within the system.
  3. Triggering other API events or interrupts: If an API's output triggers additional events or interrupts, it's critical to monitor and validate these occurrences along with their corresponding listeners.
  4. Updating data structures: When an API call modifies a data structure, it can significantly affect the system, necessitating confirmation of these changes.
  5. Modifying specific resources: APIs responsible for altering system resources must undergo thorough validation by accessing and examining the pertinent resources.

Approach of API Testing:

Users can effectively approach API testing by adhering to the following guidelines:

  1. Comprehensive Understanding: Gain a thorough comprehension of the API's functionality and clearly define the program's scope before initiating testing.
  2. Testing Methods: Utilize testing techniques such as equivalence classes, boundary value analysis, and error guessing to construct well-defined API test cases.
  3. Thoughtful Input Parameters: Ensure that input parameters for the API are meticulously planned and accurately defined to enhance the quality of testing.
  4. Test Execution and Comparison: Execute the formulated test cases and meticulously compare the anticipated outcomes with the actual results to identify any disparities or anomalies.

Best Practices of API Testing:
Here are some recommendations for organizing and conducting API testing:
  1. Categorize Test Cases: Group test cases into distinct categories to streamline the testing process.
  2. Clearly State Invoked APIs: Begin each test case by clearly identifying the APIs being utilized.
  3. Specify Parameters: Explicitly define the parameters chosen for each test case within the test itself for clarity.
  4. Prioritize API Calls: Arrange API function calls in a prioritized manner to simplify testing and ensure critical functions are tested first.
  5. Self-Contained Test Cases: Aim to make each test case self-contained and independent of external dependencies to maintain reliability.
  6. Avoid Test Chaining: Refrain from the practice of "test chaining" during development to prevent unintended dependencies between test cases.
  7. Exercise Caution with One-Time Call Functions: Be especially cautious when dealing with one-time call functions like "Delete" or "CloseWindow" to prevent unintended consequences.
  8. Meticulously Plan Call Sequences: Plan and execute call sequences meticulously to ensure thorough testing coverage.
  9. Comprehensive Test Coverage: Create test cases that cover all possible input combinations for the API to achieve comprehensive test coverage and uncover potential issues.

The Benefits of API Testing

Earlier Testing:
In API testing, once the logic is defined, tests can be created to validate response accuracy and data integrity. Unlike traditional testing methods that may require waiting for multiple teams' tasks to complete or entire applications to be developed, API test cases can be created independently and are readily available for immediate use.

Easier Test Maintenance:
User interfaces (UIs) often undergo frequent changes due to factors like web browser updates, device variations, and screen orientation adjustments. This constant evolution can result in the need for frequent revisions to test scripts to align with the changing UI. In contrast, API changes are typically more controlled and occur less frequently. Additionally, API definition files like OpenAPI Spec can streamline the process of test maintenance, requiring minimal effort and time for updates.

Faster Time To Resolution:
When API tests fail, they provide precise insights into the location and nature of the issue, minimizing the time needed to identify and resolve defects. This focused approach accelerates the Mean Time To Recovery (MTTR), a critical performance indicator for DevOps teams, as it reduces the time spent troubleshooting across different builds, integrations, and team members.

Speed and Coverage of Testing:
Running a large number of UI tests can be time-consuming, often taking hours to complete. In contrast, executing API tests is significantly faster, allowing for the completion of a comparable number of tests in a fraction of the time. This speed advantage enables quicker bug identification and resolution, ultimately improving the efficiency of the testing process.

Synchronization in Selenium

Synchronization:

Synchronization is a mechanism which involves two or more components working parallel with each other. Usually, in test automation, there will be two components such as application under test and the test automation tool. Both of them will have specified speeds and the test scripts should be written in a way such that both these components will work with same speed. This will help to avoid “Element Not Found” error which otherwise will consume more time to clear off. Here the synchronization will come for the help.


Generally, there are two different categories of synchronization in test automation.
  1. Unconditional Synchronization
  2. Conditional Synchronization
1.) Unconditional Synchronization:


In this case, only the timeout value to be specified. The tool will wait till certain time before proceeding.

Examples: Wait(), Thread.Sleep()

The main advantage of this method is that it will come for help when we interact with a third party system such as an interface. Here, it is not possible to write condition or check for a condition. In such cases, the application can be made to wait for a specific period using this type of synchronization. The major disadvantage is that at some times, the tool will be made to wait unnecessarily even when the application is ready.

2.) Conditional Synchronization:
In this case, a condition also will be specified along with the timeout value. The tool will wait to check the condition and will come out if nothing happens. However, it is important to set a timeout value also in conditional synchronization so that the tool will proceed even if the condition is not met. There two different types of conditional statements in selenium webdriver and they are an implicit wait and explicit wait.

Implicit Wait:
The implicit wait will tell to the web driver to wait for certain amount of time before it throws a "No Such Element Exception". The default setting is 0. Once we set the time, web driver will wait for that time before throwing an exception.
Syntax:
driver.manage().timeouts().implicitlyWait(TimeOut, TimeUnit.SECONDS);

Example for Implicit Wait
WebDriver driver = new FirefoxDiriver();
driver.manage().timeouts().implicitlyWait(10, TimeUnit.SECONDS);
driver.get();

Implicit wait will accept 2 parameters, the first parameter will accept the time as an integer value and the second parameter will accept the time measurement in terms of SECONDS, MINUTES, MILLISECOND, MICROSECONDS, NANOSECONDS, DAYS, HOURS, etc.

Explicit Wait:

Here a condition will be specified for a wait statement along with a specified time limit. The condition should be met within the specified time limit. The testing will start proceeding when the condition is not met within the specified period of time.

The explicit wait is used to tell the Web Driver to wait for certain conditions (Expected Conditions) or the maximum time exceeded before throwing an "ElementNotVisibleException" exception.

The explicit wait is an intelligent kind of wait, but it can be applied only for specified elements. Explicit wait gives better options than that of an implicit wait as it will wait for dynamically loaded Ajax elements.

Once we declare explicit wait we have to use "ExpectedCondtions" or we can configure how frequently we want to check the condition using Fluent Wait. These days while implementing we are using Thread.Sleep() generally it is not recommended to use.

Example for Explicit Wait


/*Explicit wait for state dropdown field*/
WebDriverWait wait = new WebDriverWait(driver, 10);
wait.until(ExpectedConditions.visibilityOfElementLocated(By.id(“statedropdown”)));

Fluent Wait:
This is used when a maximum amount of time to be allowed for a condition to met and also when the frequency of checking conditions is more.
Syntax:


Wait wait = new FluentWait(WebDriver reference)
.withTimeout(timeout, SECONDS)
.pollingEvery(timeout, SECONDS)
.ignoring(Exception.class);


Assertion In Selenium Using Nunit

Assertion:
Assertion in Selenium is used for asserting the given input value with the content or value available on the web-page. If the given value with the value on the web-page matches then we will return the true value otherwise we will return false.

If an assertion fails, the method call does not return and an error is reported. If a test contains multiple assertions, any that follow the one that failed will not be executed. For this reason, it's usually best to try for one assertion per test.

Each method may be called without a message, with a simple text message or with a message and arguments. In the last case the message is formatted using the provided text and arguments.

Two Models
Before NUnit 2.4, a separate method of the Assert class was used for each different assertion. We call this the classic model. It continues to be supported in NUnit, since many people prefer it.

Beginning with NUnit 2.4, a new constraint-based model is being introduced. This approach uses a single method of the Assert class for all assertions, passing a constraint object that specifies the test to be performed.

This constraint-based model is now used internally by NUnit for all assertions. The methods of the classic approach have been re-implemented on top of this new model.

Classic Assert Model
The classic Assert model uses a separate method to express each individual assertion of which it is capable.
example:  StringAssert.AreEqualIgnoringCase( "Hello", myString );

The Assert class provides the most commonly used assertions. For convenience of presentation, we group Assert methods as follows:


Beyond the basic facilities of Assert, additional assertions are provided by the following classes:
Constraint-Based Assert Model 
The constraint-based Assert model uses a single method of the Assert class for all assertions. The logic necessary to carry out each assertion is embedded in the constraint object passed as the second parameter to that method.
Using this model, all assertions are made using one of the forms of the Assert.That() method, which has a number of overloads. 
Use below link For Type of Constraint-Based Assert Model


Sunday, March 8, 2020

SpecFlow

What is SpecFlow?

SpecFlow is a testing framework that supports Behaviour Driven Development (BDD). It lets us define application behavior in plain meaningful English text using a simple grammar defined by a language called Gherkin. 
Use SpecFlow to define, manage and automatically execute human-readable acceptance tests in .NET projects. Writing easily understandable tests is a cornerstone of the BDD paradigm and also helps build up a living documentation of your system.
SpecFlow integrates with Visual Studio, but can be also used from the command line (e.g. on a build server). SpecFlow supports popular testing frameworks: MSTest v2, NUnit 3 and xUnit 2.
Image result for specflow

SpecFlow is inspired by Cucumber framework in the Ruby on Rails world. Cucumber uses plain English in the Gherkin format to express user stories. Once the user stories and their expectations are written, the Cucumber gem is used to execute those stores. SpecFlow brings the same concept to the .NET world and allows the developer to express the feature in plain English language. It also allows to write specification in human-readable Gherkin format.

Test-Driven Development

TDD is an iterative development process. Each iteration starts with a set of tests written for a new piece of functionality. These tests are supposed to fail during the start of iteration as there will be no application code corresponding to the tests. In the next phase of the iteration, Application code is written with an intention to pass all the tests written earlier in the iteration. Once the application code is ready tests are run.

Any failures in the test run are marked and more Application code is written/re-factored to make these tests pass. Once application code is added/re-factored the tests are run again. This cycle keeps on happening until all the tests pass. Once all the tests pass we can be sure that all the features for which tests were written have been developed.

Benefits of TDD
  • Unit test proves that the code actually works
  • Can drive the design of the program
  • Refactoring allows improving the design of the code
  • Low-Level regression test suite
  • Test first reduce the cost of the bugs
Drawbacks of TDD
  • Developer can consider it as a waste of time
  • The test can be targeted on verification of classes and methods and not on what the code really should do
  • Test become part of the maintenance overhead of a project
  • Rewrite the test when requirements change
Behavior Driven Development

Behavior Driven testing is an extension of TDD. Like in TDD in BDD also we write tests first and the add application code. BDD is popular and can be utilized for Unit level test cases and for UI level test cases. Tools like RSpec (for Ruby) or in .NET something like MSpec or SpecUnit is popular for Unit Testing following BDD approach.  Alternatively, you can write BDD-style specifications about UI interactions. The major difference that we get to see here are

  • Tests are written in plain descriptive English type grammar
  • Tests are explained as behavior of application and are more user-focused
  • Using examples to clarify requirements.
This difference brings in the need to have a language that can define, in an understandable format.

Features of BDD
  • Shifting from thinking in “tests” to thinking in “behavior”
  • Collaboration between Business stakeholders, Business Analysts, QA Team and developers
  • Ubiquitous language, it is easy to describe
  • Driven by Business Value
  • Extends Test-Driven Development (TDD) by utilizing natural language that non-technical stakeholders can understand

Data Driven Test approach

What is Data Driven Testing?

Data Driven Testing is a test automation framework that stores test data in a table or spreadsheet format. This allows automation engineers to have a single test script that can execute tests for all the test data in the table.
In this framework, input values are read from data files and are stored into a variable in test scripts. DDT (Data Driven testing) enables building both positive and negative test cases into a single test.

In Data-driven test automation framework, input data can be stored in single or multiple data sources like xls, XML, csv, and databases.


Why Data Driven Testing?

Frequently we have multiple data sets which we need to run the same tests on. To create an individual test for each data set is a lengthy and time-consuming process.

Data Driven Testing framework resolves this problem by keeping the data separate from Functional tests. The same test script can execute for different combinations of input test data and generate test results.

For example, we want to test the login system with multiple input fields with 1000 different data sets.
To test this, you can take following different approaches:

Approach 1. Create 1000 scripts one for each data-set and runs each test separately one by one.

Approach 2. Manually change the value in the test script and run it several times.

Approach 3. Import the data from the excel sheet. Fetch test data from excel rows one by one and execute the script.

In the given three scenarios first two are laborious and time-consuming. Therefore, it is ideal to follow the third approach. Thus, the third approach is nothing but a Data-Driven framework.

Best practices of Data Driven testing:
  • Below given are Best testing practices for Data-Driven testing:
  • Use Data to Drive Dynamic Assertions
  • It is ideal to use realistic information during the data-driven testing process
  • Test flow navigation should be coded inside the test script
  • Drive virtual APIs with meaningful data
  • Test positive as well as negative outcomes
  • Re-purpose Data Driven Functional Tests for Security and Performance

Advantages of Data-Driven testing
  • Allows to test application with multiple sets of data values during Regression testing
  • Test data and verification data can be organized in just one file, and it is separate from the test case logic.
  • Actions and Functions can be reused in different tests. 
  • Some tools generate test data automatically. This is useful when large volumes of random test data are necessary, which helps to save the time.
  • Allows developers and testers to have clear separation for the logic of their test cases/scripts from the test data.
  • The same test cases can be executed several times which helps to reduce test case and scripts.
  • Any changes in the test script do not effect the test data.
Disadvantages of Data Driven testing

  • Quality of the test is depended on the automation skills of the Implementing team
  • Data validation is a time-consuming task when testing large amount of data.
  • Maintenance is a big issue as large amount of coding needed for Data-Driven testing.
  • High-level technical skills are required. A tester may have to learn an entirely new scripting language.
  • A text editor like Notepad is required to create and maintain data files.

Implementation of NUnit Testing Framework

What is Unit Testing?

In this IT world a unit refers to simply a smallest piece of code which takes an input ,does certain operation, and gives an output. And testing this small piece of code is called Unit Testing.


A lot of unit test frameworks are available for .Net nowadays, if we check in Visual Studio we have MS-Test from Microsoft integrated in Visual Studio. Some 3rd party frameworks are:

  • NUnit
  • MbUnit
What is NUnit Testing?

NUnit is a unit-testing framework for .NET applications in which the entire application is isolated into diverse modules. Each module is tested independently to ensure that the objective is met. The NUnit Framework caters a range of attributes that are used during unit tests. They are used to define Test -Fixtures, Test methods, Expected Exception and Ignore methods.
Image result for nunit testing framework c#

Important NUnit Annotations
Now let’s take a look at the annotations and how to use them. The annotations are very easy to use: just add the annotation between brackets before the method declaration. With the annotation you can define the test: behavior (specifying Setup or TearDown method), assertions for example performance assertions like MaxTime method, and information like the Category method.

Annotation
Usage
Category
Specifies one or more categories for the test
Culture
Specifies cultures for which a test or fixture should be run
Indicates
Indicates that a test should be skipped unless explicitly run
Ignore
Indicates that a test shouldn't be run for some reason
MaxTime
Specifies the maximum time in milliseconds for a test case to succeed
OneTimeSetUp
Identifies methods to be called once prior to any child tests
OneTimeTearDown
Identifies methods to be called once after all child tests
Platform
Specifies platforms for which a test or fixture should be run
Random
Specifies generation of random values as arguments to a parameterized test
Repeat
Specifies that the decorated method should be executed multiple times
Retry
Causes a test to rerun if it fails, up to a maximum number of times
TearDown
Indicates a method of a TestFixture called immediately after each test method
Test
Marks a method of a TestFixture that represents a test
TestCase
Marks a method with parameters as a test and provides inline arguments
Timeout
Provides a timeout value in milliseconds for test cases
SetUp
Indicates a method of a TestFixture called immediately before each test method
TestFixture
The TestFixture attribute is an indication that a class contains test methods.
Why should I use the NUnit framework?
  • NUnit runs very well with .NET programming languages.
  • It is open source and it is free.
  • It is easy to integrate it with testing projects.
  • NUnit works with many integrated runners including Resharper and TestDriven .NET.
  • NUnit has frequent version updates.
  • NUnit has a graphical user interface.
  • Very easy integration with Visual Studio and other IDEs.

Featured Posts